So this weekend the hubby and I decided we needed to transform this old ugly entertainment center into a much NICER and more functional TV stand that would fit our television...here is our journey...:)
before: such a sad waste of furniture. :)
After we took the top hutch part off, we realized the original top had too many holes from screws in it...SO we removed the top from the hutch section, and replaced them out.
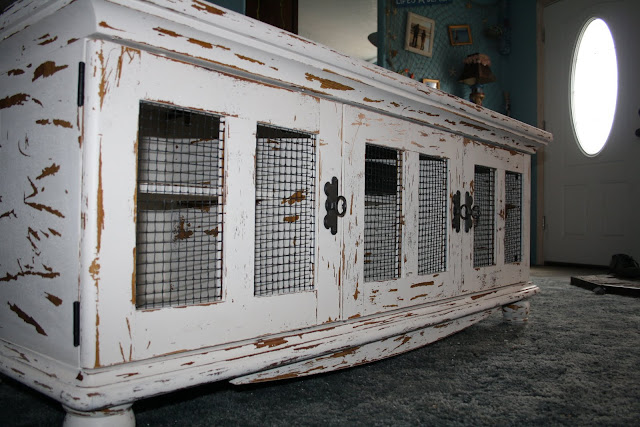
The painting begins...at first we were just going to paint it solid white, but we started sanding some of the edges and liked the patina it gave it. :) We also used old rabbit cage wire on the inside panels of the doors so that we could utilize our remote controls without having to keep the doors open.
Our little logo. My hubby engraved in the top. :)
All set up! :) So cute! I am loving it!
There you have it! With a little time and effort you can re-purpose any piece of furniture that you may not love to begin with, but turn it into something you'll really enjoy! ALSO...total cost for this project $10.37...The entertainment center was a gift from my inlaws that didn't want it anymore. We only had to buy spray paint for the rabbit wire, a couple paint brushes and some screen spline to hold the wire in place in the inside panels.
For enquiring minds, because I'm sure I'm going to get MANY questions on this: Screening Spline.
Screening spline is a rubber type rope in many different size gauges used on the inside groove of a window (or in this case a door) to hold screen in place.
Now, to insert this spline you can do it one of two ways...have the nifty roller tool to roll it in...OR if you don't have one or access to one, a flat head screw driver will also work!
So after working your screening or wire into the gap, you start rolling your spline into the open space...
Its really very easy! And the finished product looks awesome! Here is a couple of pics to show you how you can use each tool...


Your husband scratching in your "logo" is adorable. Awesome transformation!
ReplyDeleteSo, I like the chicken wire and I think you should definitely add a couple more pictures of that process (including how to use screen spline???) because you can bet your bottom dollar at least one person (other than me) will ask you how to do that. I'd love to feature this on my blog.
Thanks Sandra! I will be working on posting that first thing in the morning! My baby girl has her first day of school tomorrow! Oh so sad... :( but also exciting.
ReplyDeleteOh, that's how you do it. That's so cool! Thanks for the little tute on screening spline. Very useful info. I'm going to spotlight you tomorrow!
ReplyDelete